Your Nvidia Control Panel is missing from the Start context menu or not in the system tray? The Nvidia Control Panel not working issue could be caused by an outdated graphics driver or missing registry subkeys and values, etc. No worries. Here are 4 effective ways to help you resolve the Nvidia Control Panel missing issue in Windows 10 (including Creators Update), Windows 8.1, Windows 8, or Windows 7.
1. Uninstall and Reinstall Nvidia Graphics Driver to Fix Nvidia Control Panel Missing
The Nvidia Control Panel missing or not opening issue could be caused by driver incompatibility, and you could try to uninstall your Nvidia graphics driver and then go to NVIDIA’s website to look for the right driver and then manually download and install it.
See Also: 3 Ways to Uninstall Nvidia Drivers in Windows 10
2. Update Graphics Driver to Fix Nvidia Control Panel Missing in Windows 10, 8.1, 8, 7
The outdated or damaged graphics driver could trigger the Nvidia Control Panel missing problem in Windows 10, Windows 8.1, Windows 8, or Windows 7. To fix the graphics driver issue quickly, you could go to Nvidia’s Driver Downloads page to look for the correct driver and then manually download and install it on your PC, but it is complicated and takes quite a period of time. If you are a novice computer user, you could use a reliable drivers download and update utility tool to help you resolve the Nvidia Control Panel missing issue, and Driver Talent is highly recommended, which could scan out all your problematic Windows drivers in seconds, and then automatically repair them within few minutes.
Click the button below to get Driver Talent directly.
Here is a straightforward guide on how to download and install the best-matched graphics card driver with Driver Talent to resolve the Nvidia Control Panel missing from the context menu problem in Windows 10, Windows 8.1, Windows 8, or Windows 7.
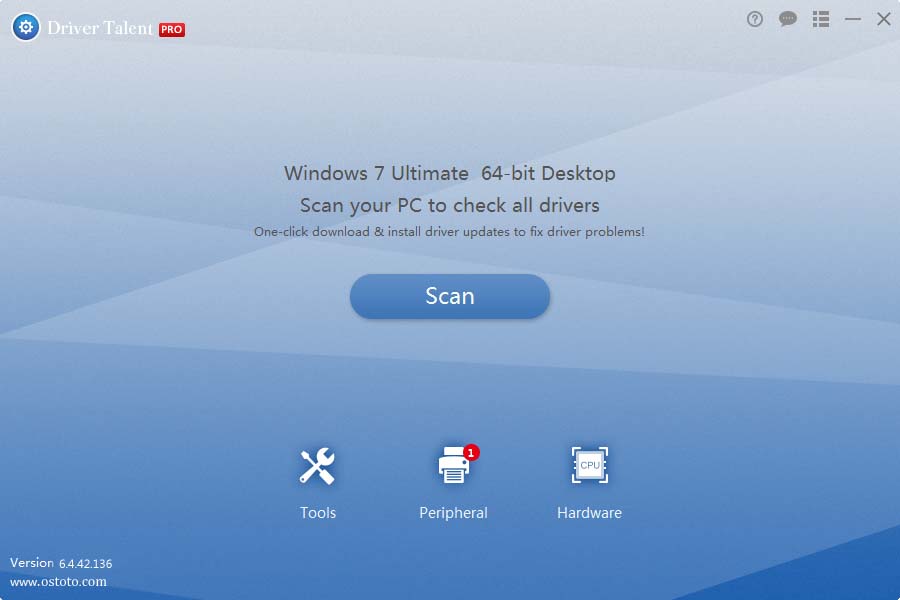
Step 1. Scan Your PC
Launch Driver Talent. Click the “Scan” button and Driver Talent will automatically detect your graphics card and operating system. When the scanning process is complete, all the problematic drivers will show up, including the graphics driver.
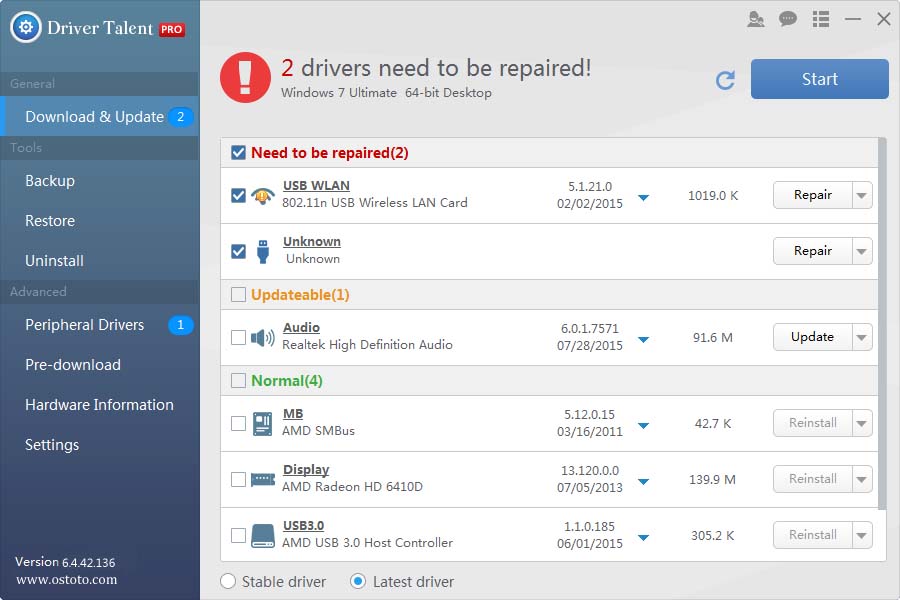
Step 2. Update Graphics Driver
If your graphics driver is identified as outdated, you could just click “Update” to let Driver Talent to automatically download and install the latest graphics driver for your computer. If it is corrupted or damaged, you could click “Repair” to fix it.
Step 3. Restart Your PC
A PC reboot is required once the graphics driver installation is finished.
For more information about how to download and update the Windows drivers, you could check out the User Guide of Driver Talent.
Note: Keep in mind that always back up your drivers and with Driver Talent in case of driver crashes. You could also use Driver Talent to create a system point in advance and perform a system restore if you encounter a system crash in the future.
Apart from driver update and driver backup, Drive Talent is equipped with other advanced features, such as driver restore, driver uninstall, system restore, driver pre-download for another PC, PC repair (no sound, no video, no Wi-Fi etc.), DLL files repair, hardware detection, VR support check and PC speed up, etc.
3. Modify Registry Subkeys and Values
According to some Windows users, the missing registry subkeys and values could also result in the Nvidia Control Panel missing issue from the context menu. You could use a .reg file to modify it. Follow these steps:
Step 1. Create a blank document using a text editor such as Notepad, and paste the following into the text file and save it with the .reg extension:
Windows Registry Editor Version 5.00
[HKEY_LOCAL_MACHINE\SOFTWARE\NVIDIA Corporation\NvTray]
[HKEY_LOCAL_MACHINE\SOFTWARE\NVIDIA Corporation\NvTray\0_nvupdt.dll]
"FullPath"="C:\\Program Files\\NVIDIA Corporation\\Update Core\\NvGFTrayPlugin.dll"
Step 2. Double-click the .reg file (select Yes if prompted) to run it and all the necessary keys and values will be added.
Step 3. Reboot your PC.
4. Turn Off GPU Virtualization
If your motherboard is equipped with the onboard GPU, there’s chance that the GPU Virtualization associated with the VirtuMVP software on your computer causes the Nvidia Control Panel missing or disappeared problem. You shall disable the GPU Virtualization. Take these steps:
Step 1. Open VirtuMVP control panel.
Note: The VirtuMVP icon shall be next to your clock in the system tray.
Step 2. In the main tab, locate the GPU Virtualization option and turn it off to fix the NVIDIA control panel missing or not working issue.
If your Nvidia Control Panel missing issue still persists, you could leave comments in the comment section below, or create a post in OSToto’s forum for further help. If you find other workarounds for the Nvidia Control Panel missing problem, please take a minute to leave comments. Thanks.
You may also like to check out: